final exam
Required Question #1
1. Throughout the year I've had to use supplies given to me and then supplies that I had to go out and buy. Some tools I've had supplied in the classroom are kilns, wire cutters, clay, clay roller, and clay wheels. And then when we did more detailed clay projects I actually went out and bought some clay tools. I was really happy I did purchase the clay tools because they helped get really small lines that I wanted to make my piece more detailed. Such as in my sgraffito piece I wanted to use a bunch of small lines in my project so I used a super small carving tool to do this.
1. Throughout the year I've had to use supplies given to me and then supplies that I had to go out and buy. Some tools I've had supplied in the classroom are kilns, wire cutters, clay, clay roller, and clay wheels. And then when we did more detailed clay projects I actually went out and bought some clay tools. I was really happy I did purchase the clay tools because they helped get really small lines that I wanted to make my piece more detailed. Such as in my sgraffito piece I wanted to use a bunch of small lines in my project so I used a super small carving tool to do this.
Required Question #2
2. In the beginning of the semester I tried out different tools to see which ones worked better for different details in my pieces. So my first clay project I had to redo many times because I would carve too much away, or I thought the tool would carve a a smaller portion of the clay out when it really took a much bigger portion of the clay out. But I was really happy that I tried out these tools because my first project actually came out really successful and I loved it, I keep it on my desk as a decoration. But really I went into this class knowing nothing about any of the tools, but just testing them out of different pieces made me learn a lot and all of the details and textures I could add with these tools.
2. In the beginning of the semester I tried out different tools to see which ones worked better for different details in my pieces. So my first clay project I had to redo many times because I would carve too much away, or I thought the tool would carve a a smaller portion of the clay out when it really took a much bigger portion of the clay out. But I was really happy that I tried out these tools because my first project actually came out really successful and I loved it, I keep it on my desk as a decoration. But really I went into this class knowing nothing about any of the tools, but just testing them out of different pieces made me learn a lot and all of the details and textures I could add with these tools.
Picked Question #1:
What was your favorite material to work with this year? Why did you like working with it?
My favorite material to work with this year was the paper mache. It's weird for me to pick this as my favorite material though because I chose not to finish it because I was impatient with sanding and went through many sanding bars just for one side. I liked this material so much probably because of most of the projects we did in this class were clay, and overall I was really happy with this project the only thing I didn't like about it was the sanding. I actually still have the project in my garage and might continue to work on it over the summer when there's time and have nothing else to do because I loved the idea, I just was really impatient with the plaster sanding to get it super smooth to my liking.
Picked Question #2
Which project was your most successful? Describe the theme of your project and the process you went through to make your project.
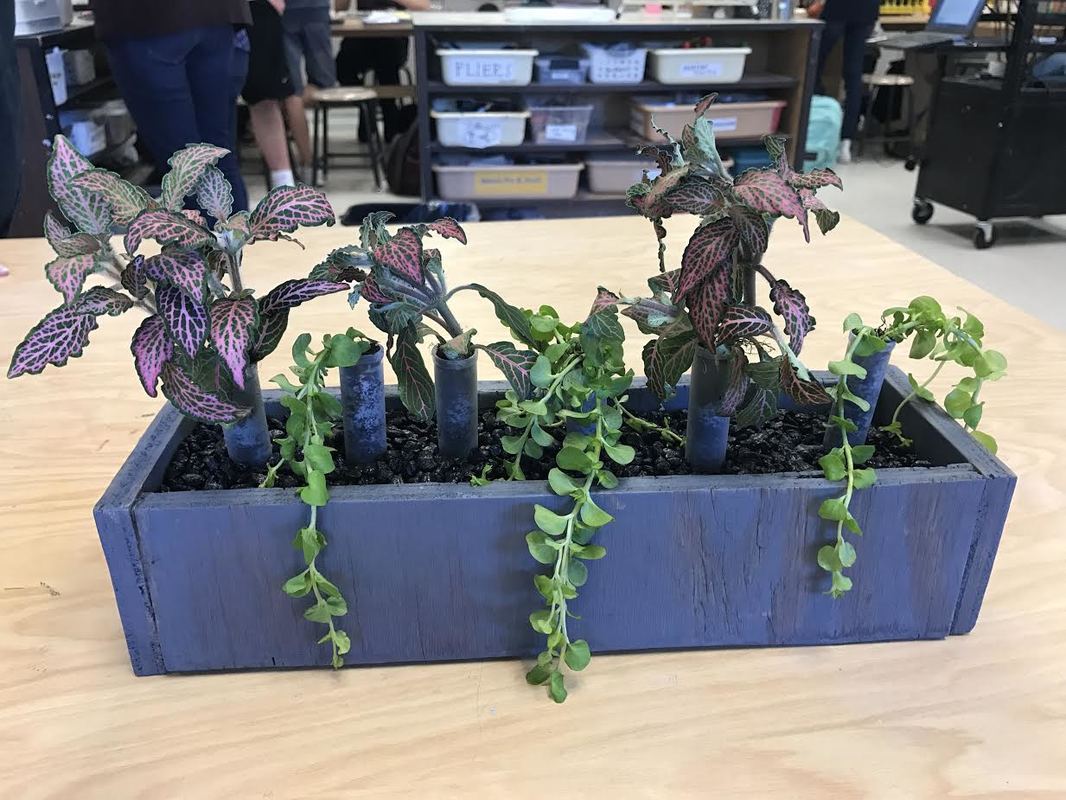
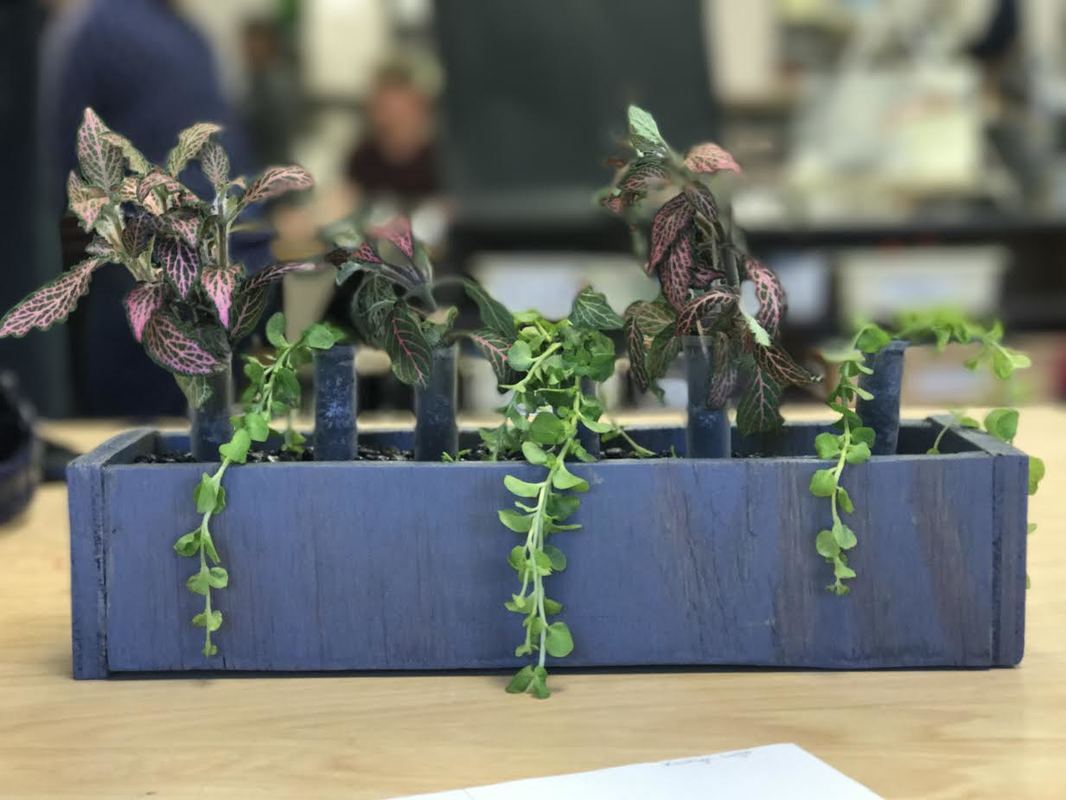
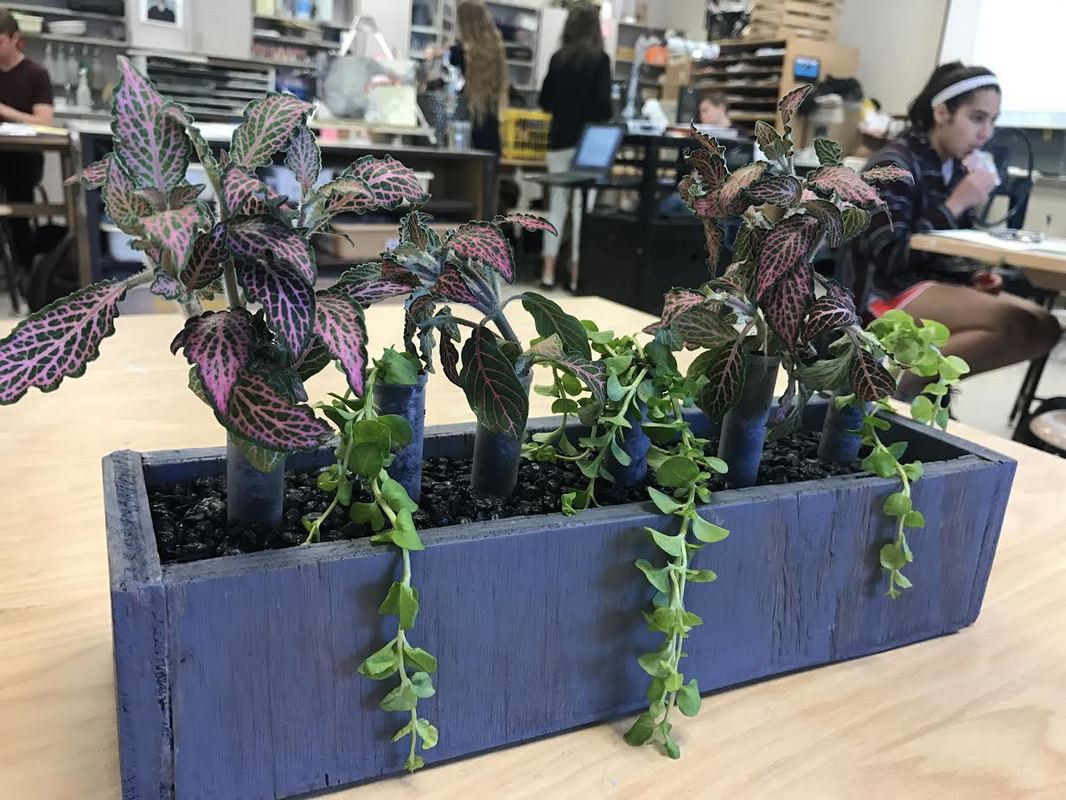
My most successful project to me was the Unconventional Materials Project. For my project I got these small test tubes, and I had no idea what I was going to use these for when I first got them. But then I had an idea so the theme of this project was health related. It doesn't seem like this project would be health related at all but it connects together. So the test tubes reminded me of a hospital because of the blood drawing tubes, and hospitals help people get better. So then I continued with this health idea and I thought maybe I could plant some plants inside of these test tubes because planting plants is always helpful to the environment when we are always taking away trees that take out carbon dioxide from our atmosphere. So with this theme I related the way humans get healthy and the way environments can get healthy. The process I went through for this project is I took some big pieces of wood and cut them in the size I wanted the main pot holder to be. Once these were the size I wanted I sanded these pieces down so that they wouldn't splinter. After they were sanded I glued them together with wood glue. Once the glue had dried overnight I then took my project home to stain the wood a gray color, I took some black fish rocks and used those as the "soil" for the test tubes. I put some actual soil into the test tubes along with some plants. And that's my project completed.
Which project was your most successful? Describe the theme of your project and the process you went through to make your project.
My most successful project to me was the Unconventional Materials Project. For my project I got these small test tubes, and I had no idea what I was going to use these for when I first got them. But then I had an idea so the theme of this project was health related. It doesn't seem like this project would be health related at all but it connects together. So the test tubes reminded me of a hospital because of the blood drawing tubes, and hospitals help people get better. So then I continued with this health idea and I thought maybe I could plant some plants inside of these test tubes because planting plants is always helpful to the environment when we are always taking away trees that take out carbon dioxide from our atmosphere. So with this theme I related the way humans get healthy and the way environments can get healthy. The process I went through for this project is I took some big pieces of wood and cut them in the size I wanted the main pot holder to be. Once these were the size I wanted I sanded these pieces down so that they wouldn't splinter. After they were sanded I glued them together with wood glue. Once the glue had dried overnight I then took my project home to stain the wood a gray color, I took some black fish rocks and used those as the "soil" for the test tubes. I put some actual soil into the test tubes along with some plants. And that's my project completed.

Picked Question #3
Which project was least successful?
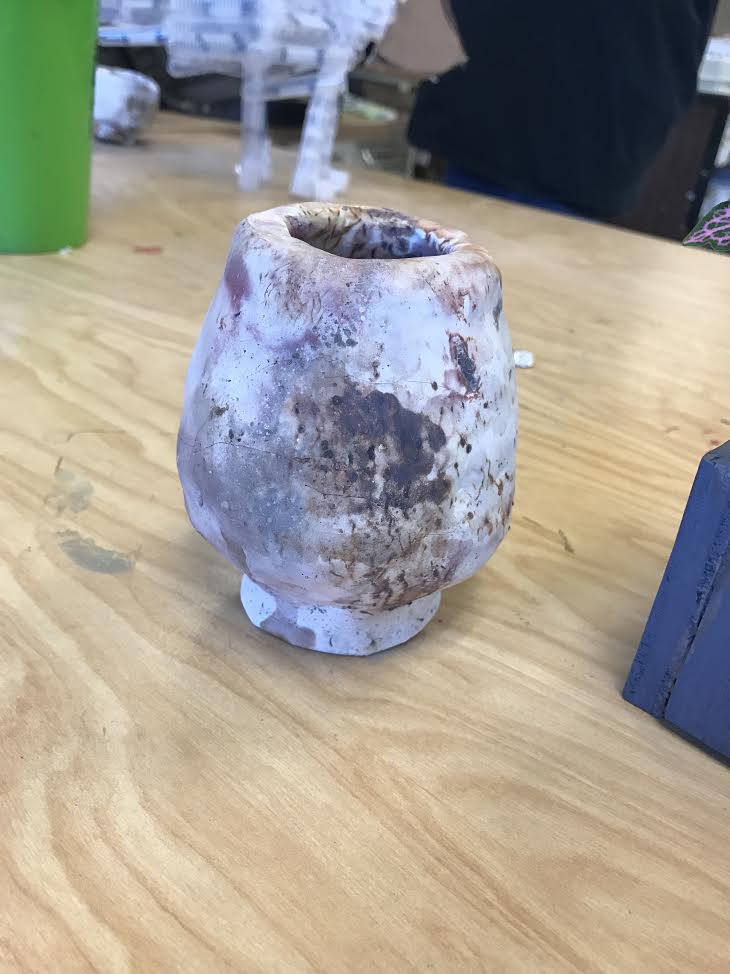
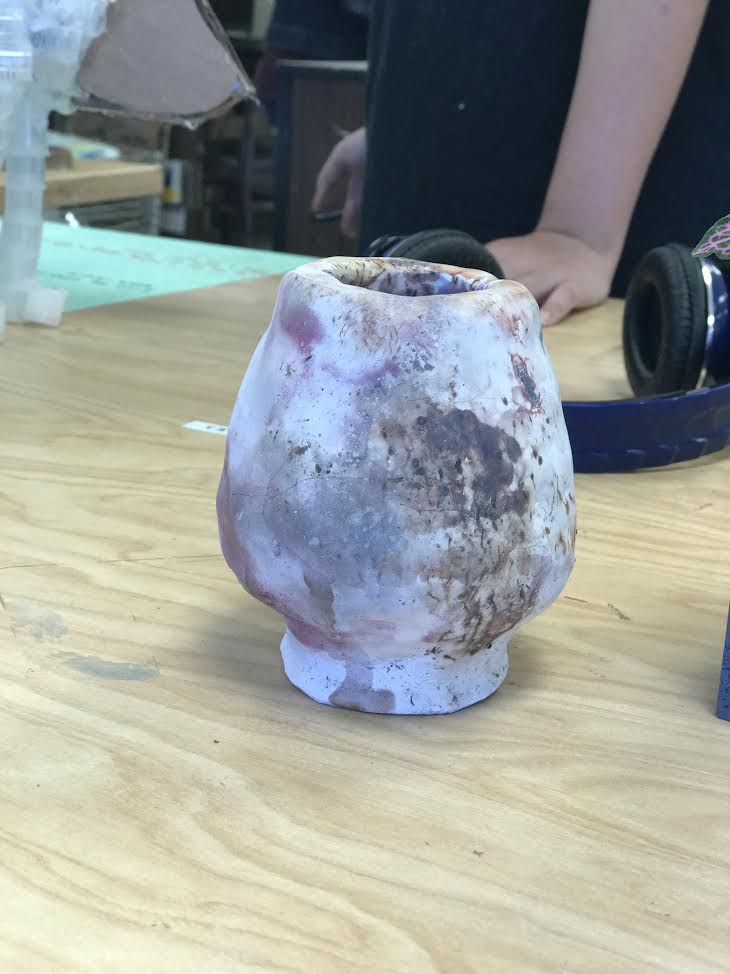
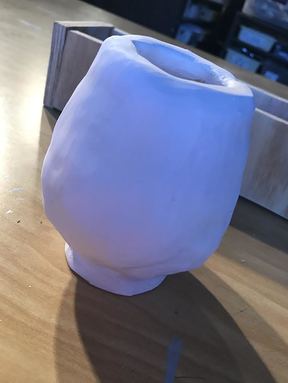
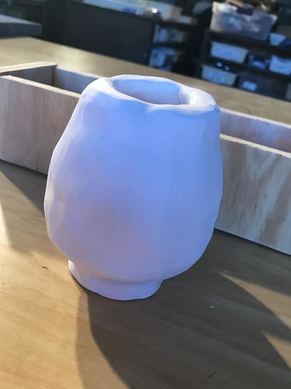
I think my pit fire project was the last successful because everything about it I didn't like. The vase was super uneven such as when I turned it some places would stick out farther than others, the part that's near the base was very uneven. There were some parts of the base that went in and it wasn't completely circular. And also I wasn't happy with the coloration of the piece. I wasn't happy with the coloration because when i put everything on the piece I thought I was putting too many things on it and the colors were all going to glob together, but apparently I didn't put enough, and I also didn't like the color combinations that went together.
Which project was least successful?
I think my pit fire project was the last successful because everything about it I didn't like. The vase was super uneven such as when I turned it some places would stick out farther than others, the part that's near the base was very uneven. There were some parts of the base that went in and it wasn't completely circular. And also I wasn't happy with the coloration of the piece. I wasn't happy with the coloration because when i put everything on the piece I thought I was putting too many things on it and the colors were all going to glob together, but apparently I didn't put enough, and I also didn't like the color combinations that went together.
|
And as you can see in this picture the left side goes out more, while being raised higher than the right side.
|
installation project
1. We never finished doing the installation project only a few of us actually traced out the pieces of the rose petals. But as you can see in the picture below I only got one rose petal done, and had the traces for the other one cut out at least.
2. If we were to do another installation project probably just have it more organized.
2. If we were to do another installation project probably just have it more organized.
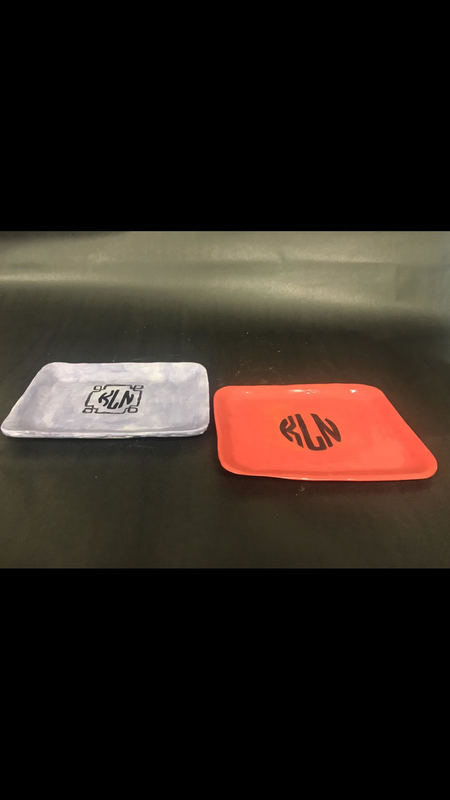
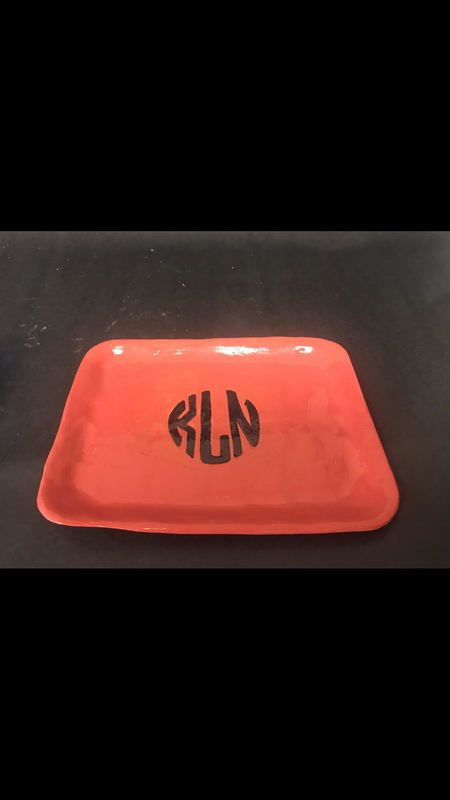
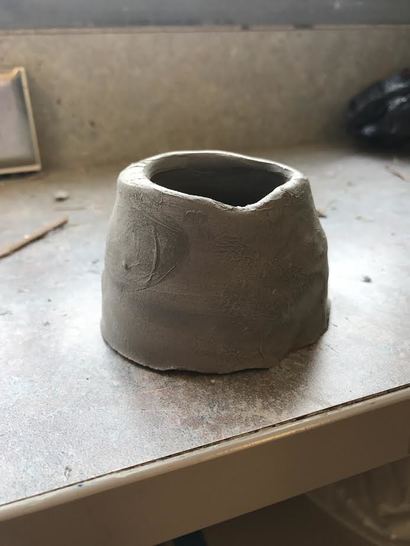
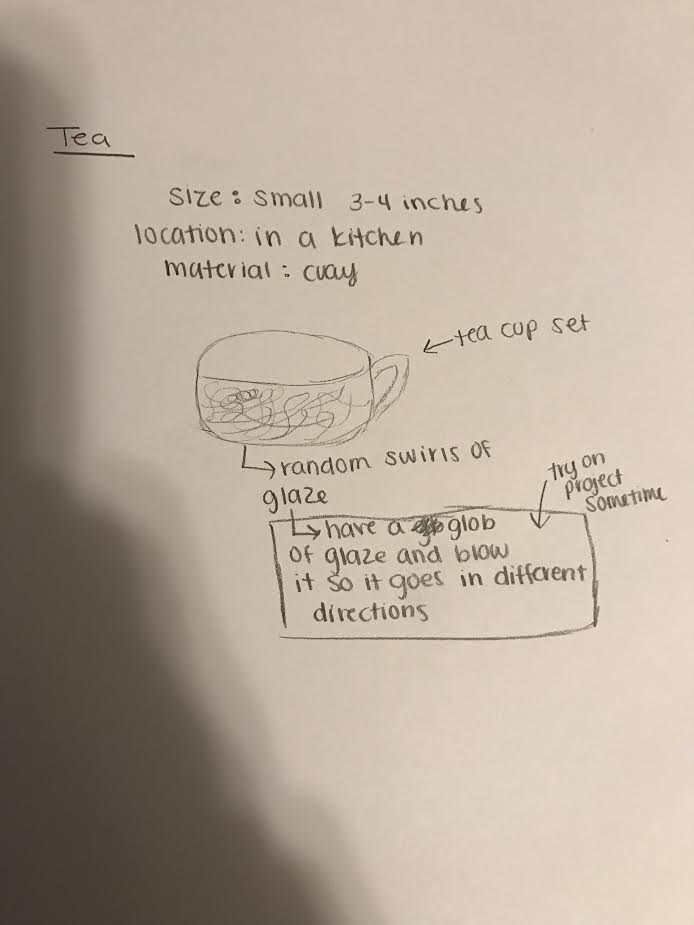
Clay trays: MONOGRAMMED jewelry trays
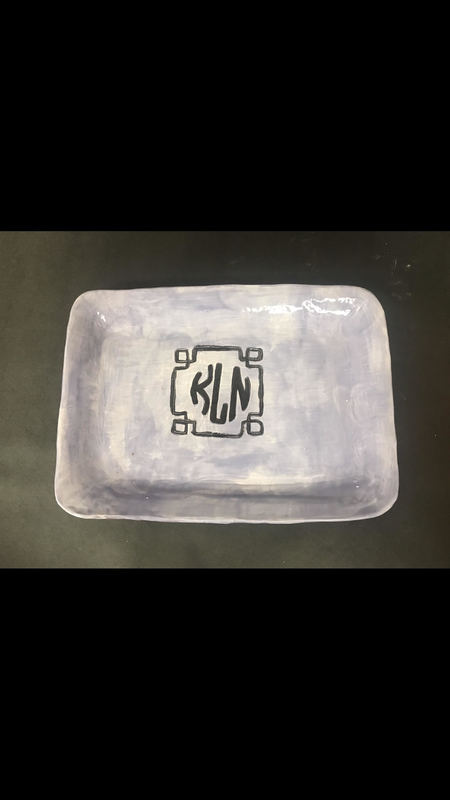
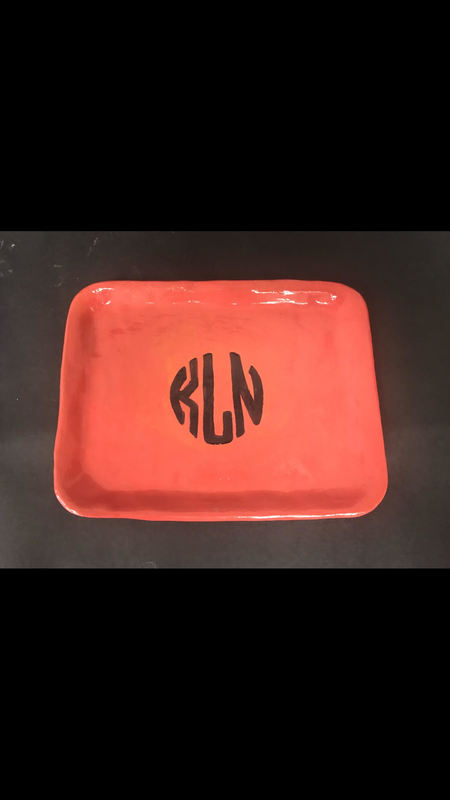
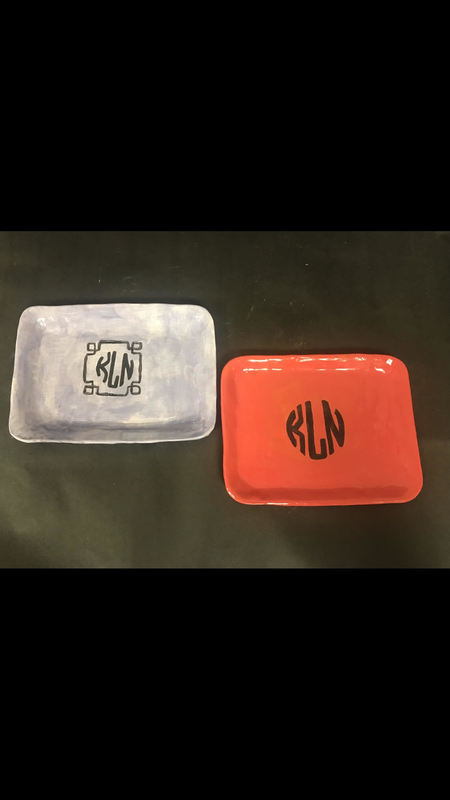
1. My clay trays were made into a monogrammed jewelry tray. The shape of this implies this because they aren't deep so that my bracelets and rings just lay on top of it, easy to grab when I'm about to leave the house.
2. I came up with the idea because I was just in a monogram shop earlier that week and I was going to get some monogrammed jewelry trays but I was already getting a ring and necklace made so I thought it would be the perfect thing to make.
3. What I did for this project was I first got a handful of clay, after I thought I got enough clay I then wedged it so that there wouldn't be any air inside of the pieces so they wouldn't explode inside of the kiln. Once the clay was wedged thin enough I took it over to the slab roller to make it thin enoguh
|
|
|
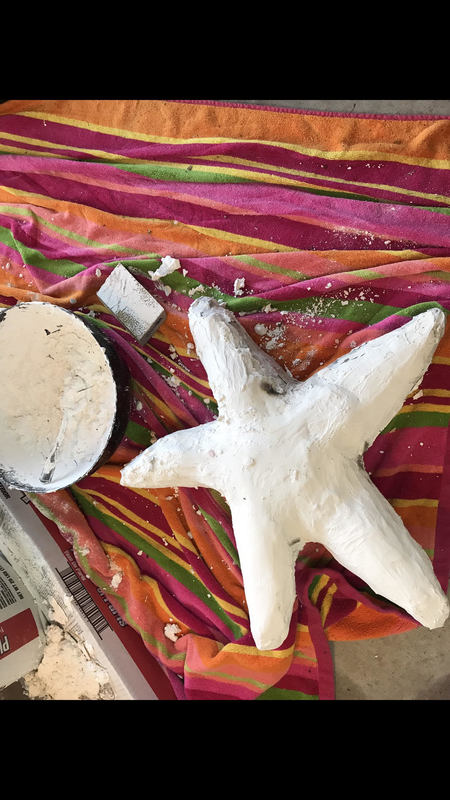
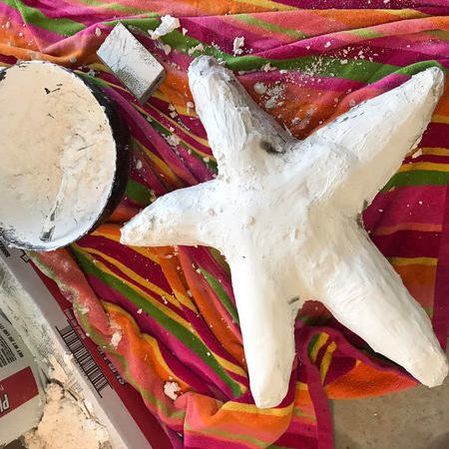
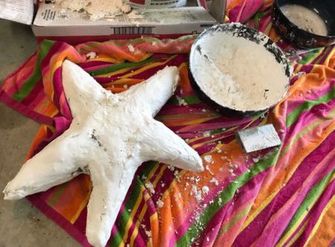
paper mache: starfish
1. I didn't chose to finish my piece although now that I look at the pictures of my piece I wish I had because the base of it was really strong so that was what I found successful in my piece and what I also found successful was the shape of it, my paper mache piece actually had a really good shape to be a starfish.
2. The only reason that I quit working on this project was because of smoothing the plaster with a sand bar. I would try and lay it down and smooth it with my hands but it would still be very bumpy and just one side (left picture) I went through over 10 sand bars to smooth it out, and it still wasn't the way I wanted it. Smoothing was just too time consuming for me.
3. Like I said above in number 2 the only reason I didn't finish it was because sanding was taking too much time, but now that I look at the pictures of it I wish that I had finished the project.
|
|
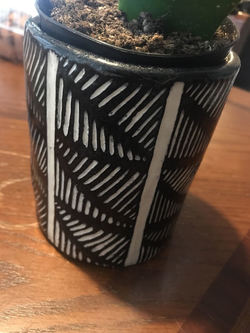
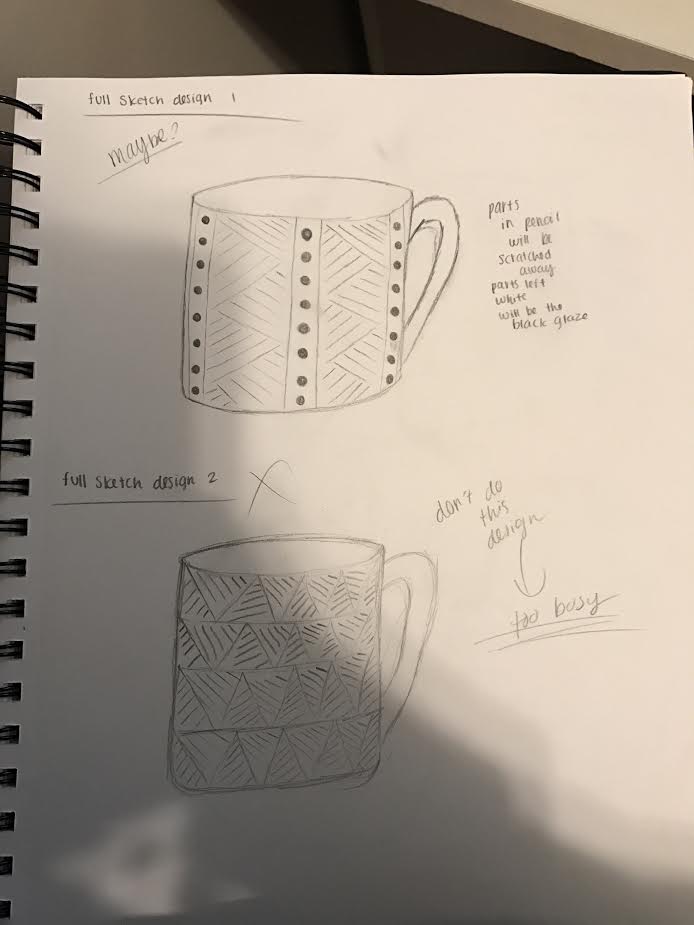
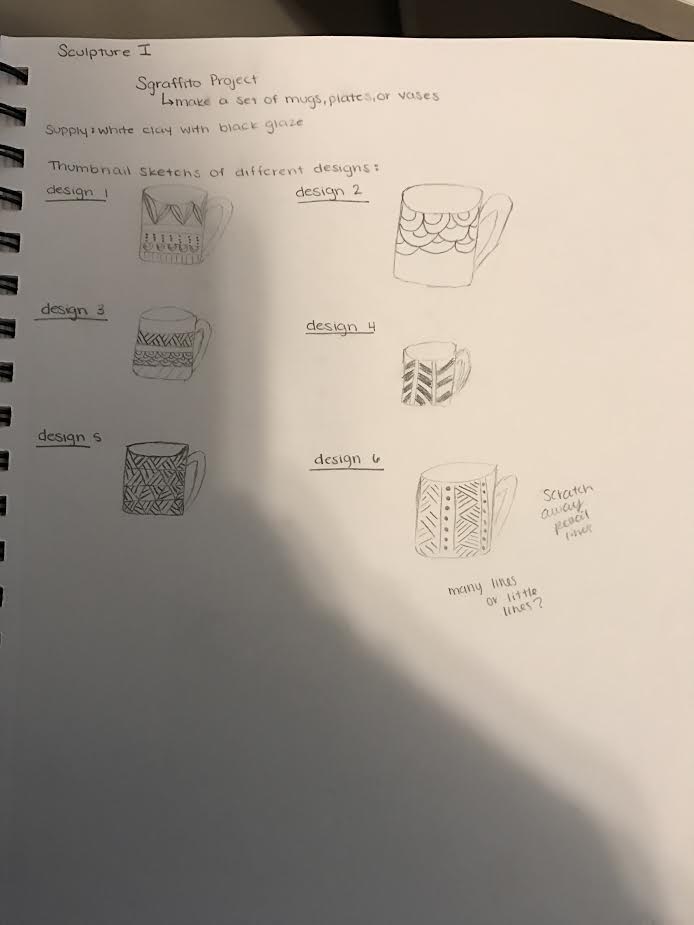
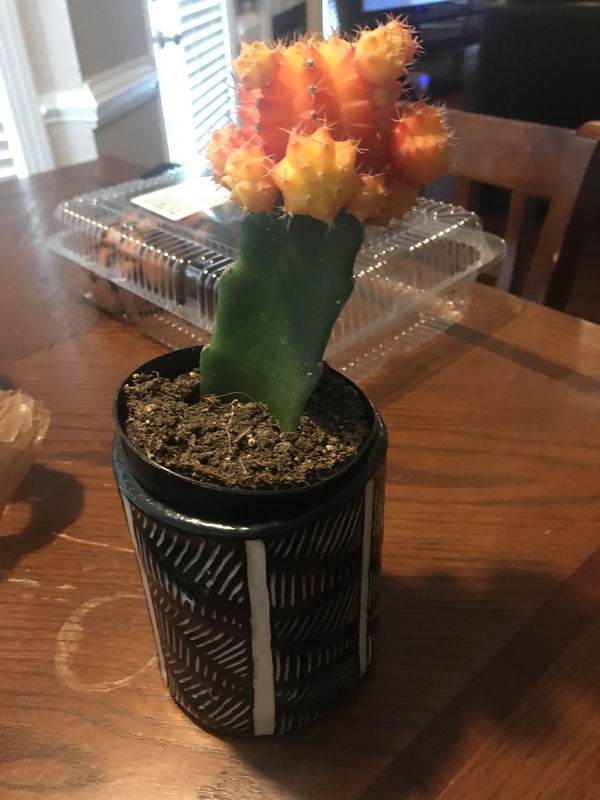
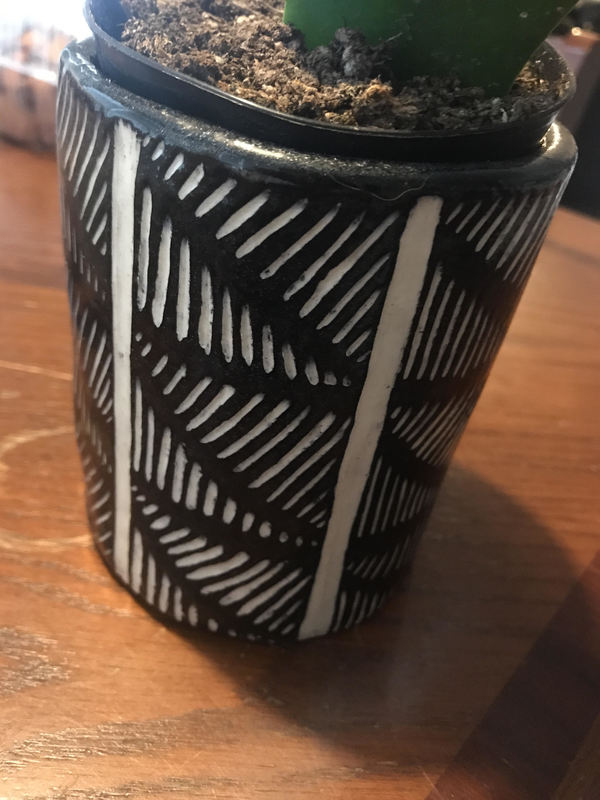
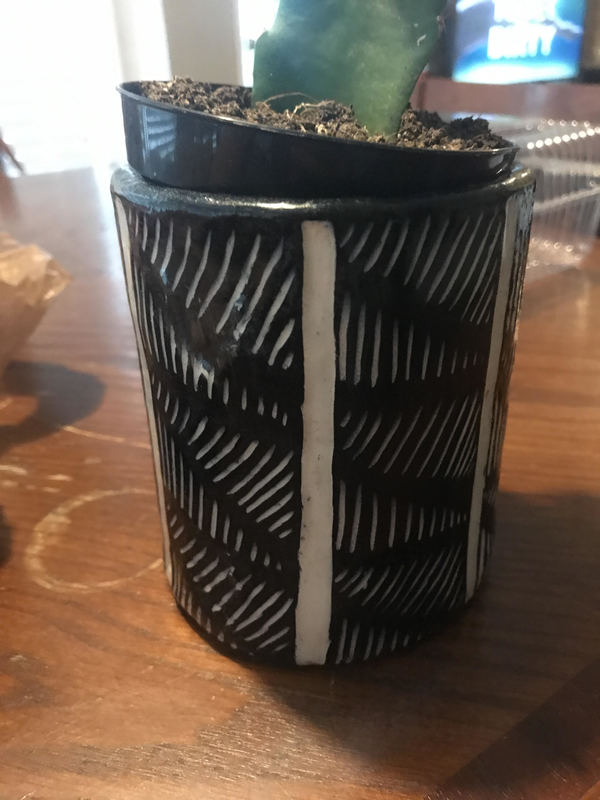
Sgraffito project
1. The process I used to make my Sgraffito pot was to roll out a slab of clay, once I had it rolled out I took a smoothing tool so that the clay wouldn't have texture from the rolling cloth. Once it was all smoothed out I wrapped it around a small pipe in the size I wanted it to be. I let the clay dry for a few days so I could paint it with the black scrape off glaze so that i could then scrape off my design. Originally this pot was supposed to be a mug but I wasn't happy with the ratio of the handle to cup size.
2. I think the process of sgraffito actually worked out really well there wasn't too many complications I came across along the way.
3. I was actually really happy with my piece and if I were to do it again then I'd try to make the lines the same thickness, but the lines carved away are actually really white so I was happy I carved enough of the glaze away.
|
|
|
|
|
|
I
throwing on the wheel
1. Process: The process of throwing on the wheel includes getting a slab of clay about the size of your wrist, then you want to center it on the wheel and make sure no water is underneath the clay so that the piece doesn't go flying off the wheel. I then made it into a dome shape, once I was happy with that shape I pressed my thumbs in the center of the clay to get the hole in the middle.
2. Difficulties: I had trouble getting the clay shaped, I watched many youtube videos on how to use the wheel with clay and nothing seemed to help, the clay would be too soft, it would become too thin, or since my nails are long they would carve out some parts of the inside of the clay when I would try and create the dip in the middle.
3. Successful: In the end I think the shape is pretty successful, I finally got it to be fairly even so I was happy with that. Although I do wish it was more in a bowl shape.
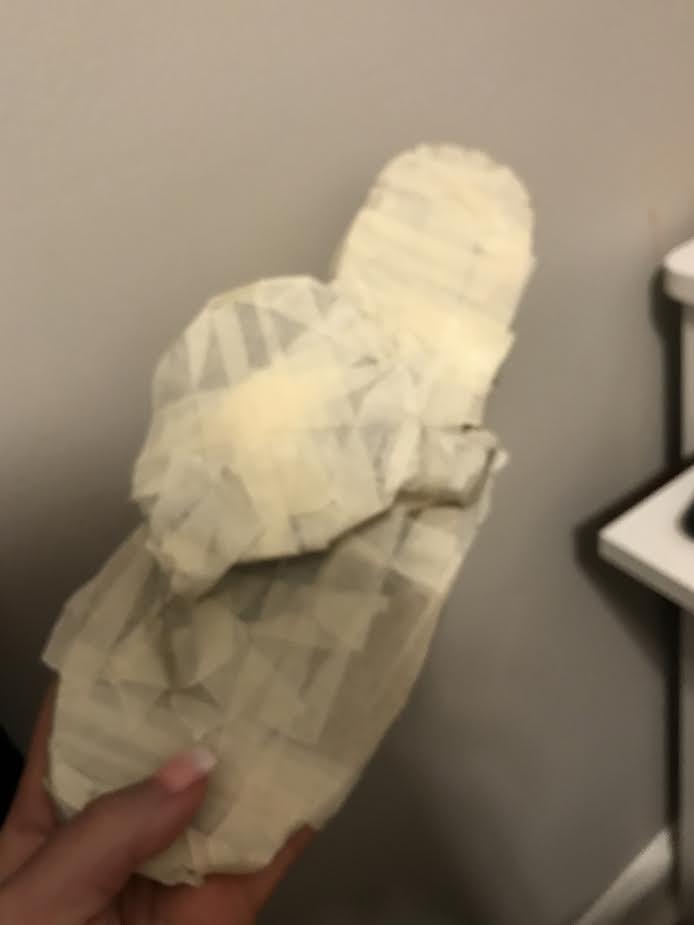
masking tape shoes
|

|
Questions:
1. Process: what I did to make the shoe was started off by creating the base of it, I tried to get it to close the same size or even a little bigger because I thought working bigger or close to size would be easiest. Then I used an index card to create a tube shape to the sandal band, and just wrapped the tape around and put it all together.
2. Successful: I think I did a good job with the base of the shoe, I tried to make the base of it really strong so that the rest of it would hopefully be easier.
3. Change/unsuccessful: Next time I would probably cut out details in the shoe because the original does have some cut outs for designs, but they're so small I didn't0. want to mess us the tape shoe.
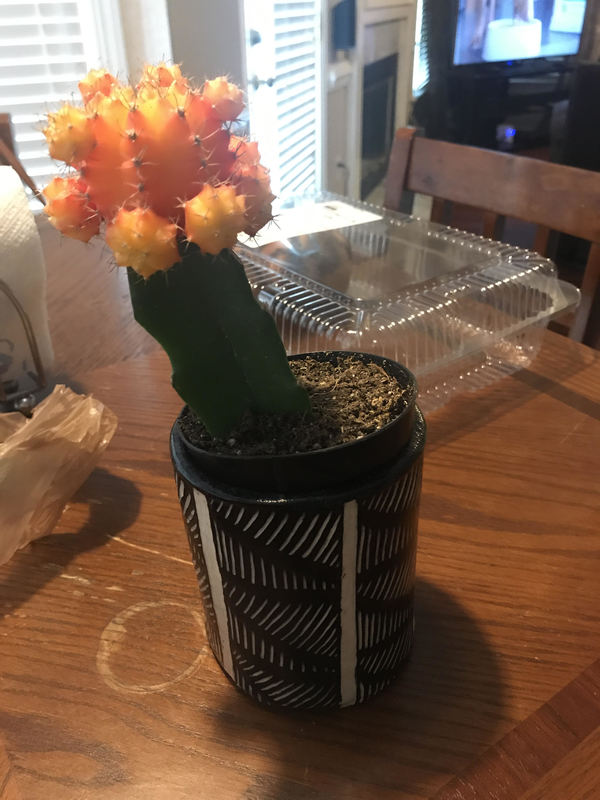
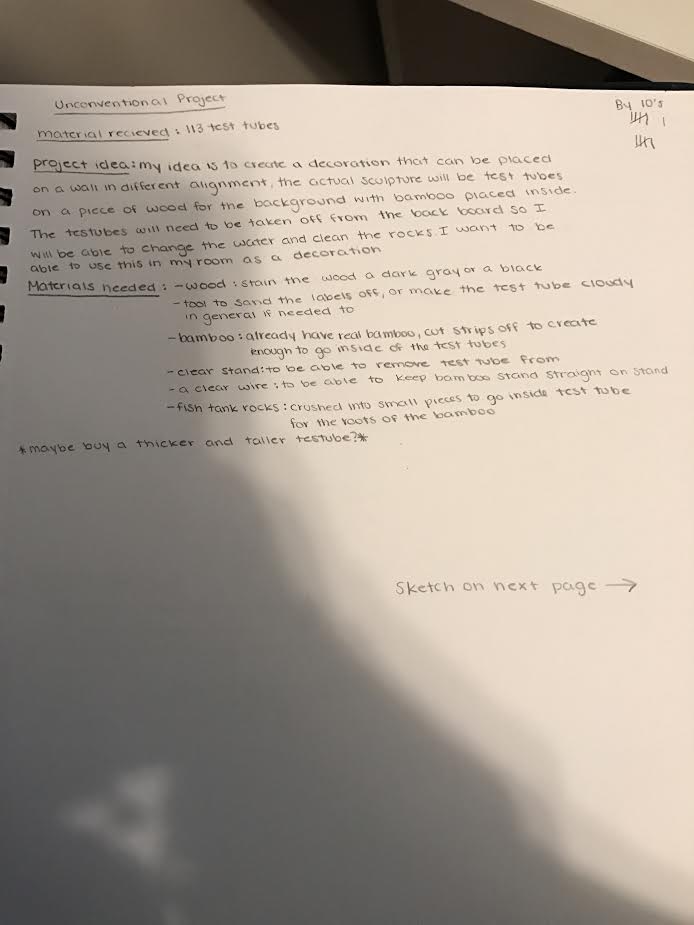
unconventional material challenge
|
|

|
|
2-3 Pictures of piece from different angles:
Questions:
1. The material I received was test tubes.
2. What made it hard to work with is that I didn't know what I could possibly make with test tubes, my mind was completely blank with ideas.
3. I made the test tubes a plant pot, and then made the whole thing into a small desk garden. I chose to make it into a garden because I thought it would be different and unique. And I think it turned out really pretty and bright.
4. One way that I would change the project is that I would try and sand the wood holder more because some places were a little sharp. And I think I would get a more opaque stain for the wood. I knew I wanted a gray wood stain but I didn't know that it would be that dark, I wanted some of the woods print to show through.
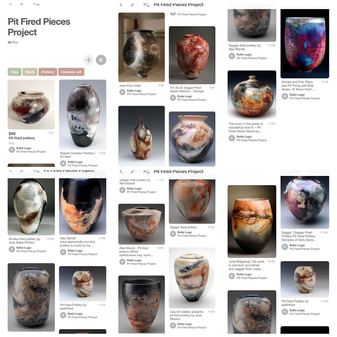
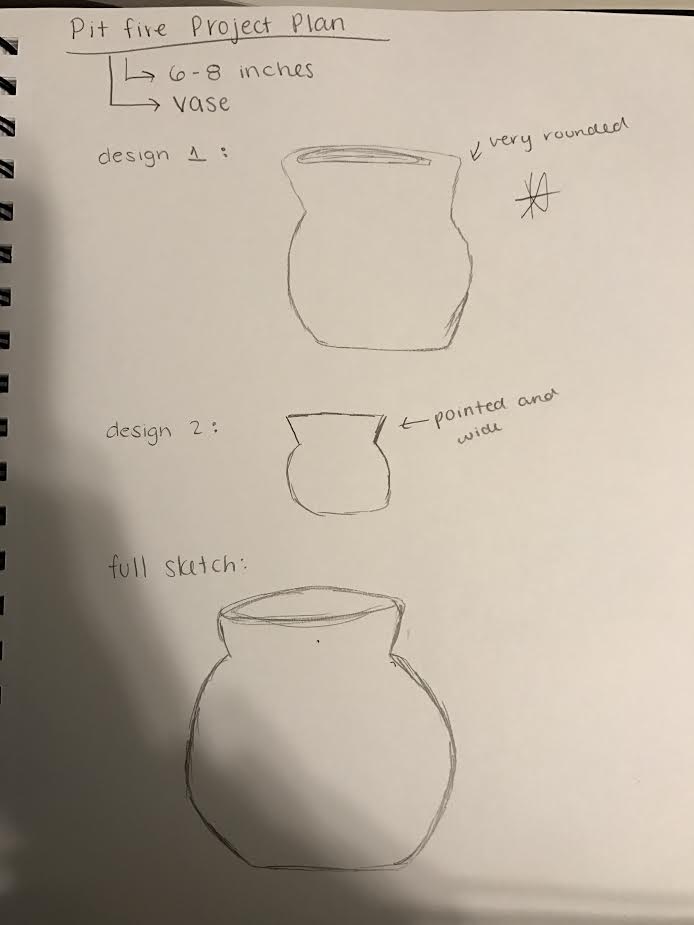
pit fire
Learning Technique:
1. I plan on using the coiling technique for my project.
2. In our group each person made a coiling tutorial so that all of the work was divided evenly. My group consisted of Myrah, and Em, we turned in the tutorial page but didn't take a picture of each.
1. I plan on using the coiling technique for my project.
2. In our group each person made a coiling tutorial so that all of the work was divided evenly. My group consisted of Myrah, and Em, we turned in the tutorial page but didn't take a picture of each.
|
|


|
|
Pit Fired Ceramics:
1. I started my piece by taking a big clump of clay and then cutting it into a bunch of small sections. I took one of these sections and used it to make the base, and then I rolled the other sections and scored it onto the base. I kept repeating scoring each roll to build up the vase. When I was happy with the shape and the size of the vase i took a spoon and smoothed everything the best that I could. After I got my piece fired the first time I was able to put a bunch of flammable objects surrounding my piece so that it would create patterns and colors on the piece.
2. I think my piece was pretty successful in the shape, it wasn't lumpy it was pretty even and smooth so I was happy with that. If I were to change anything I would add more flammable objects because there are some white parts that i thought i had covered but they still came out white and bare but other than that I was pretty happy with the piece.
Relief Project

|
|
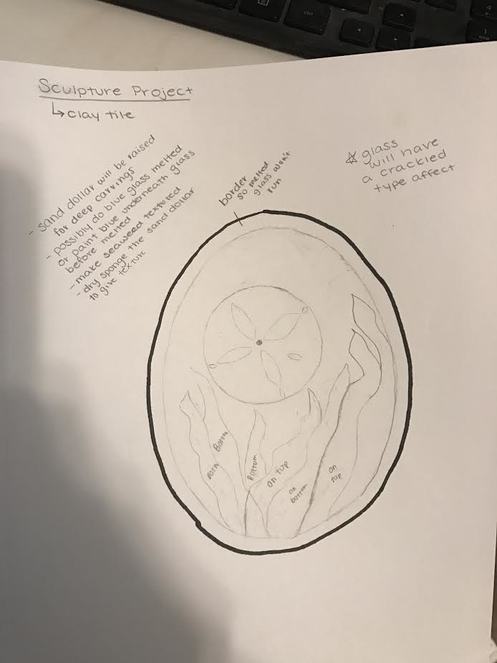
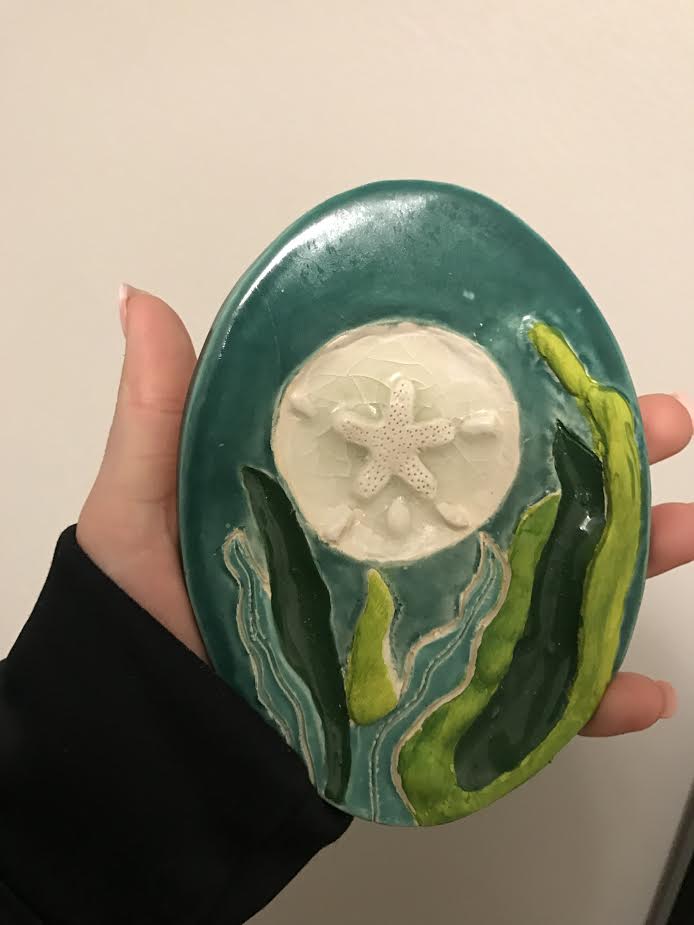
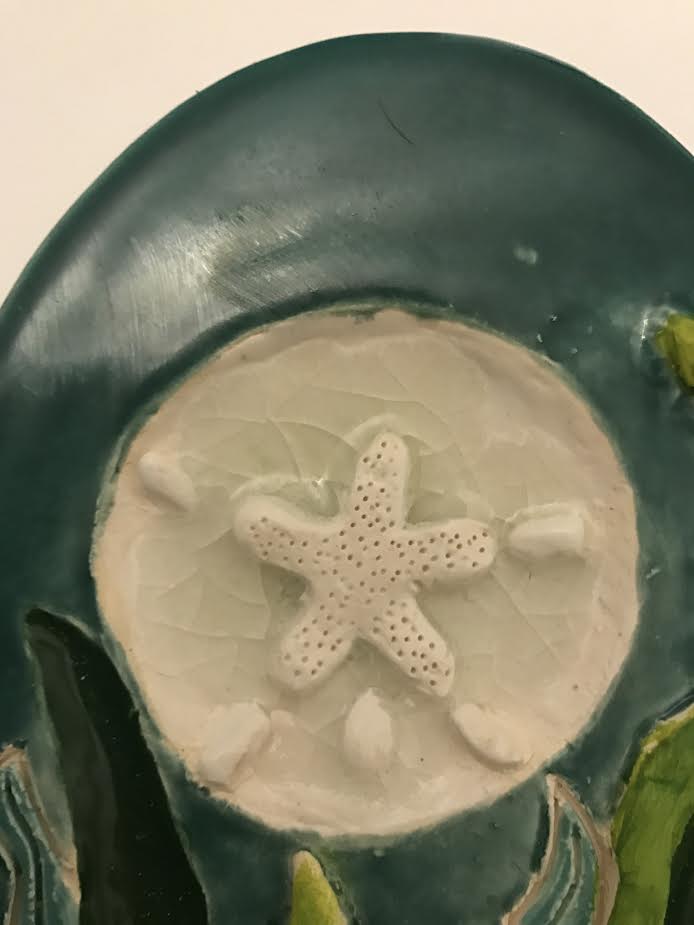
Tile Piece:
1. I found successful was the glass, the glass perfectly filled the sand dollar, so that it wasn't overflowing onto the ocean part. I was worried that with the glass that there may not be enough of it, or that there was too much and that it would overflow onto the pieces sticking out of the sand dollar, or overflow onto the ocean background. I also really like the kelp in my piece because they show that somethings are forward in the background and others behind. What I mean by this is that some of the kelp is sticking out from the piece so that it looks like it is in the front, some are level with the clay tile to show that it's in the middle. And then I have some of the kelp carved to show that they're far in the background.
2. If i were to do it again I think I would add more to the background. I would've added a small starfish or a small fish. The fish or starfish would've been seprate so that they stick out from the rest of the piece like some of the kelp leaves.
3. I picked a sand dollar for my tile piece because in my room I have sand dollars on my nightstand and desk from when I found them at the beach, and thought it would be cool to have filled with the glass.
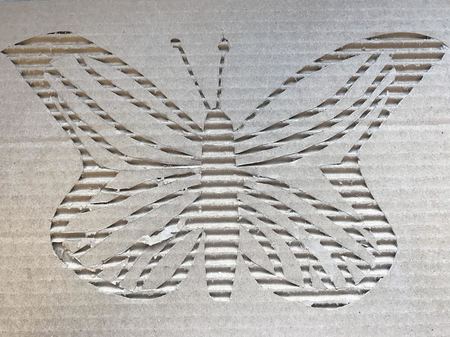
Cardboard Piece:
1. What worked in my piece is the cutting of the cardboard, when I used the exacto I would get a bunch of the cardboard fuzzies still left on the the cardboard ridges, so I took my piece home and I used tweezers to get all the small fuzzies off and it got it really clean.
2. If I were to do this again or add anything to the piece I would want to paint it so it would stand out more, I think I would do unrealistic colors for something different and to make it color and add character to the piece.
3. I picked a butterfly for the piece because I thought about their design and I thought their designs would look pretty with it cut out knowing that the underneath of cardboard was ridged almost hilly.
clay vocabulary
Inspired Artist
|
|
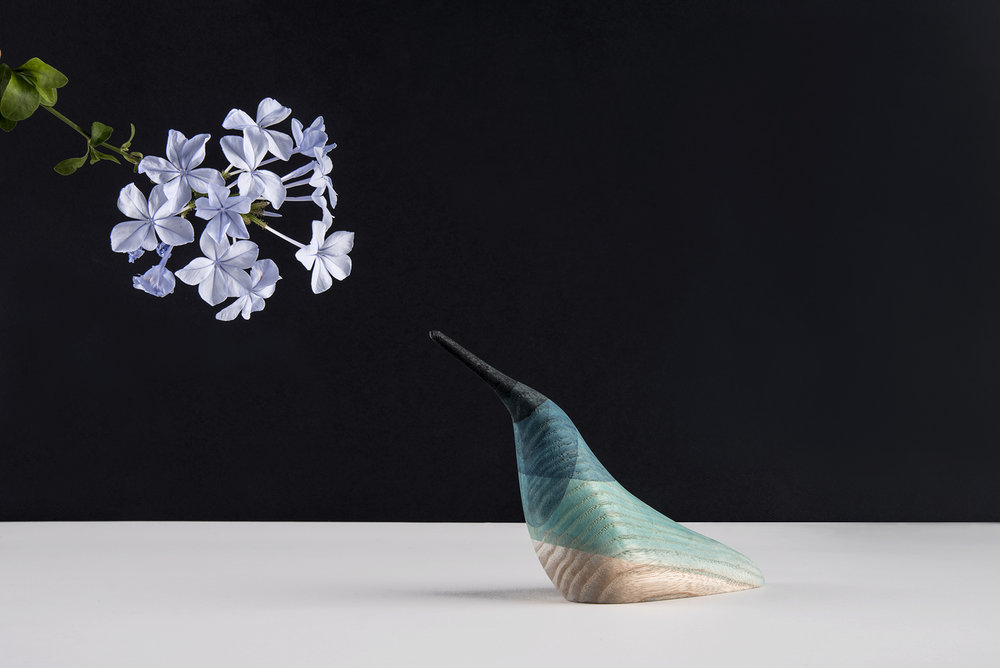
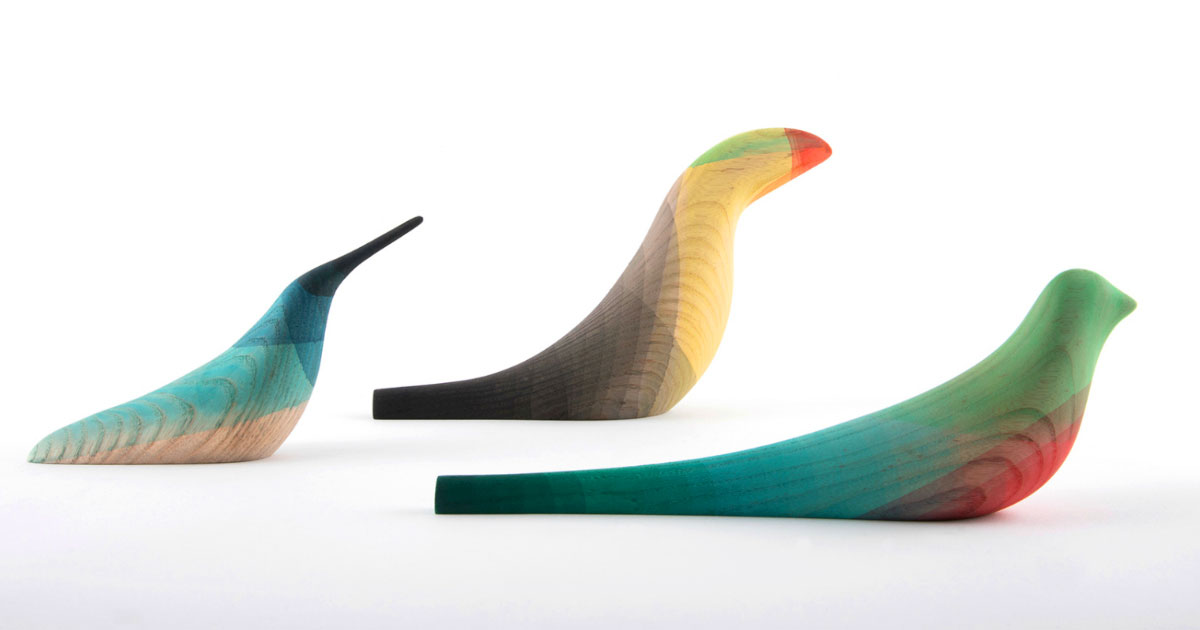
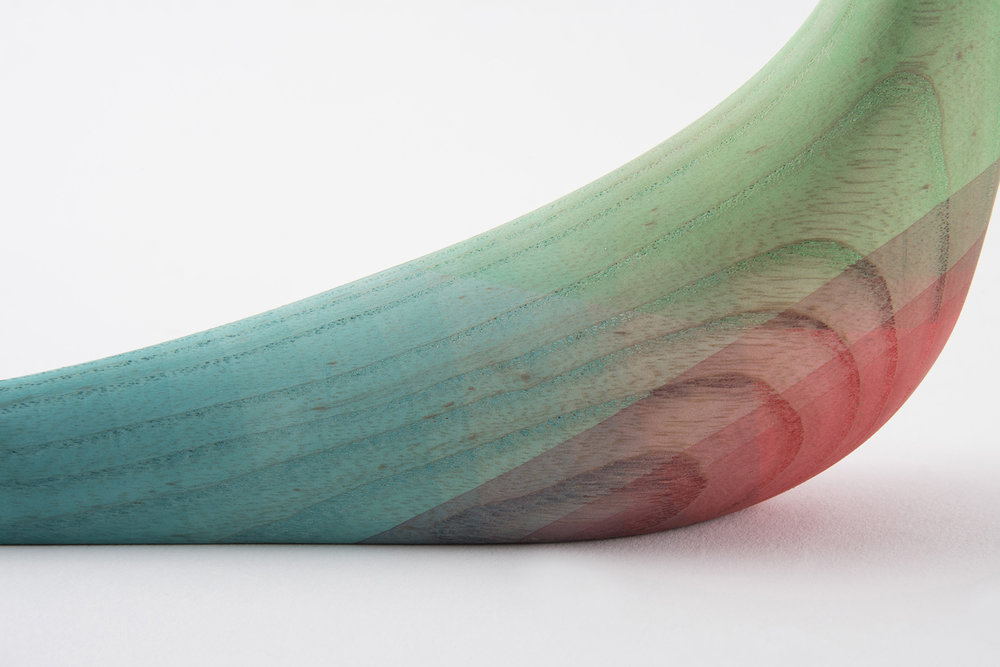
The artist I chose was Moisés Hernández. Although it doesn't say exactly where he was located, it does say he is a mexican designer. Each of his pieces are made from wood with CNC technology. They are then dipped into a sequence of watercolor paints. I was drawn in by this artists work because of the colors. The colors are light but still stand out of the bird, and I love how the bird is dipped at different angles of watercolor. http://www.moises-hernandez.com/immersed-birds/
texture Mini post
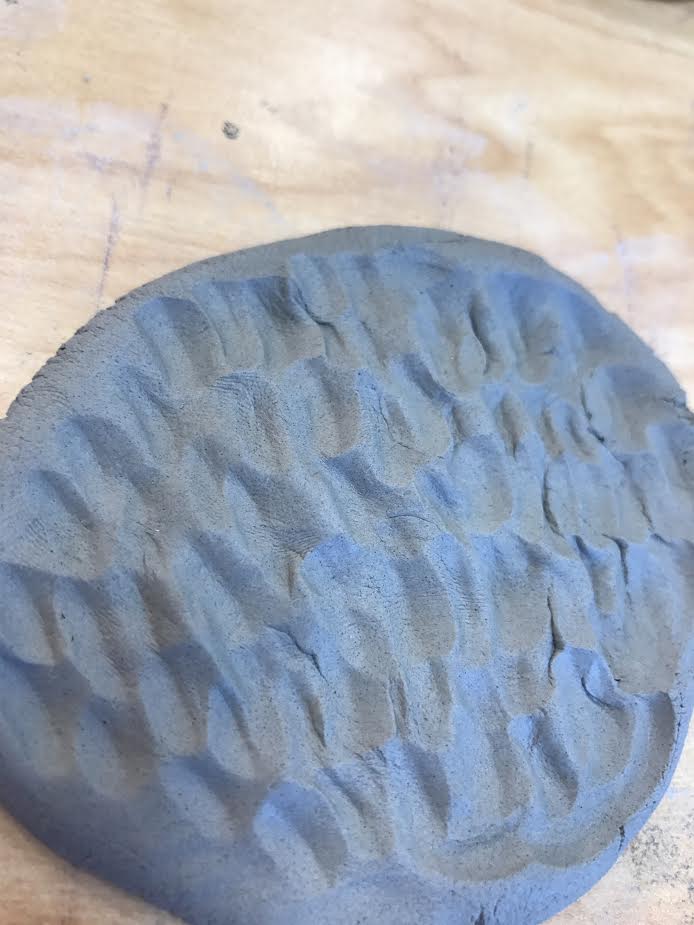
I found the cloud the second easiest clay texture to make because to try and get a soft texture to the clay I pressed a sponge into it, which I still didn't get the softest looking texture but I think it came out better than how the hair did.
|
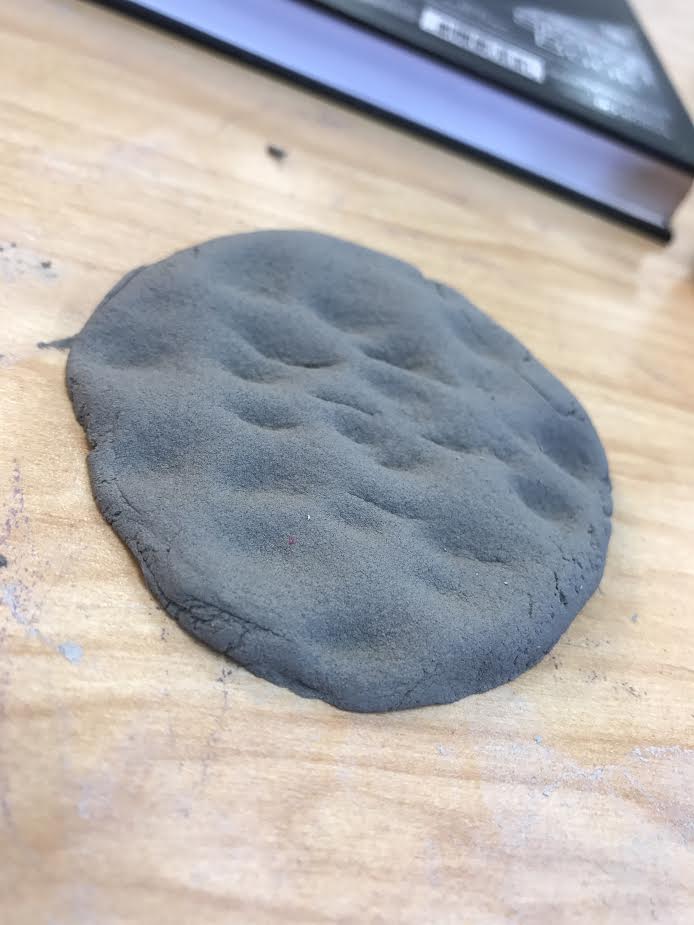
I found the rock the easiest of the three textures because all i had to do was press a rock into the clay to get the texture of a rock.
|
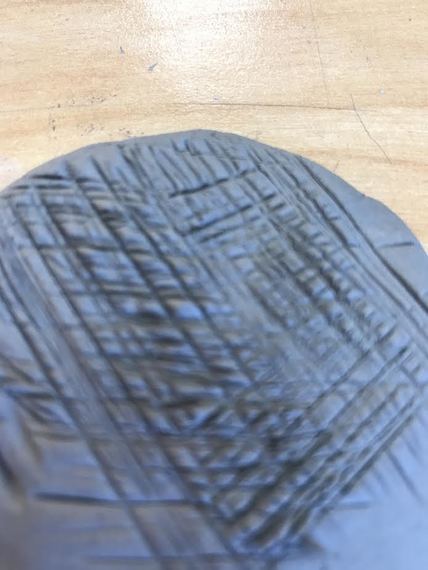
I found the texture of hair the hardest because it was hard to try and scratch the clay enough to get every single hair, I tried making a ton of scratches in the clay but it still didn't look like hair. I think maybe I should've made the hair strokes longer and shorter and more close together.
illustration fridays


|
snail
|
